It's Monday. Again.
I realize Monday comes every week, but every weekend I find myself hoping it would hold off for just a day longer. This weekend was no exception. I spent my Friday catching up with one of my favorite people, my Saturday hosting a birthday dinner party and my Sunday trekking up a mountain then eating cheese fondue. A lovely weekend as far as I'm concerned.
It's not surprising that Saturday is the inspiration for this post. There's just no way I could pass up talking about the food my roommate and I made. Home made hummus, mini calzones, salmon with dill - pistachio pistou, rosemary potatoes...mmm. I promise I'll post more about the hummus and salmon as they deserve their own moment in time. Right now though, it's all about the mini calzones.
I can't take credit for the idea. I found the recipe for these Saturday morning as I was pouring through my newest cookbook, Jamie's Dinners by Jamie Oliver. The combination is such a simple spin on some classic combinations so I just had to try them. They turned out perfectly. Well, almost perfect. I'll have to work on my calzone crimping skills for next time. They were sort of like snowflakes - no two were folded the same. Also, using larger pieces of prosciutto to make little "bundles" with the mozzarella, basil and tomatoes would probably keep the calzones from leaking their insides while baking. All in all, these were worth the effort and will be making repeat appearances at dinner parties to come.
The original recipe did not include specific quantities for the ingredients. I've approximated here just to making shopping easier. Enjoy!
mini calzones with prosciutto, mozzarella and tomatoes
makes approximately 20
1 package frozen puff pastry dough, thawed
12 ounces thinly sliced prosciutto
16 ounces fresh mozzarella balls
cherry tomatoes, halved
fresh basil leaves
salt and freshly ground black pepper
1 egg, beaten
splash of milk (for egg wash)
Preheat oven to 425 degrees. Roll the puff pastry out on a lightly flour dusted surface until just under a 1/4 inch thick. Using a 5 inch plate as a template, cut out about 7 circles. On one half of each circle lay a slice of prosciutto, followed by large thumbed sized piece of mozzarella, a cherry tomato half and a fresh basil leaf. Season with salt and freshly ground black pepper. Wrap the prosciutto around the filling to hold it together, then egg wash the edges of the pastry and fold it in half. Pinch or crimp the sides together so the filling won't leak out. Bake until golden brown and crisp on the outside.
Monday, April 26, 2010
Saturday, April 24, 2010
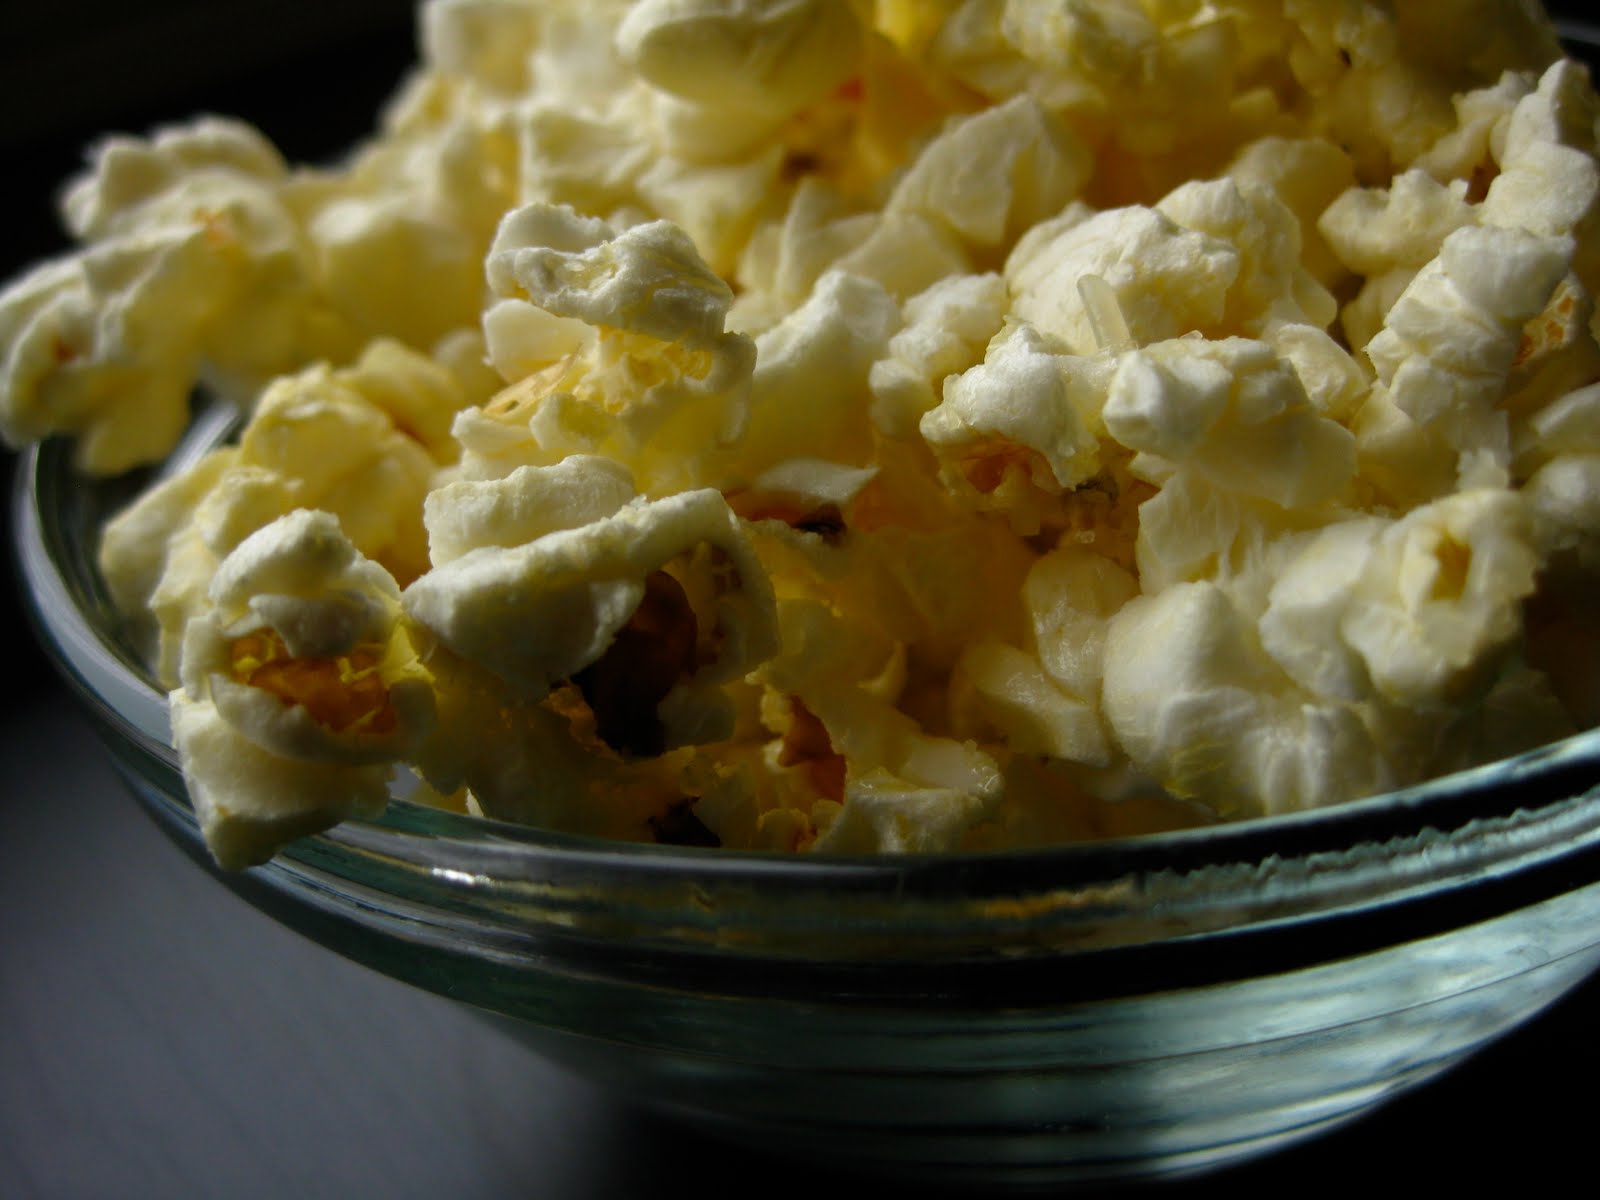
truffle popcorn
I have great news! My cleanse is finally over. I'll have you know that it ended with plates of sushi and all the appropriate accompaniments. And it was lovely.
In that same vein, I've been reacquainting myself with many other foods and beverages. Last night was no exception. After a few bottles of yummy red wine, it was time for snacks. Enter popcorn. Not just any popcorn. Truffle popcorn.
Truffle popcorn can made a few different ways depending on what you have on hand at home. Last night I used truffle oil because I was at a friend's house. But typically, when I'm home, I make it with truffle salt. While the two have almost the same flavor, I think the salt is a little easier to distribute over the popcorn so that each bite is packed with tons of flavor. Plus, the salt gives you an excuse to add melted butter. Enjoy!
truffle popcorn
makes one large bowl
(or a few little ones)
4 cups unsalted popped popcorn
3 tablespoons unsalted butter, melted
1-2 teaspoons good quality truffle salt
1/4 cup grated parmesan cheese (optional)
Add melted butter to popped popcorn slowly, stirring to distribute. Add truffle salt in portions, to taste. Finish wish parmesan cheese if using. Stir well to combine all ingredients. Serve immediately.
Wednesday, April 14, 2010
viceroy burgers
Sundays are for cheaters. At least according to my friend Paul they are.
This past Sunday, I buckled under the pressure. I cheated.
For those of you who are pure at heart (or maybe for those of you who aren't so pure at heart), don't get too excited. I wasn't part of a steamy sordid affair with a somehow inappropriate but incredibly good looking man. I'm in the middle of a two week cleanse and Sunday I gave in to a deliciously sinful burger. A burger that was worth every moment. Let me explain.
The inspiration for these burgers came long before my cleanse started and consequently a long way from home. I spent a week in Palm Springs this past February in the fabulous Viceroy Hotel which is home to a little restaurant called Citron. The restaurant was of course overpriced as most hotel restaurants are. So instead of ordering a $20 cheeseburger while lounging by the pool, my friend Jill jotted down all the ingredients to the Viceroy Burger. Horseradish aoli, balsamic onions, gruyere, bacon, blue cheese and arugula. Not one type of cheese, but two. And bacon. Now you see where the word sinful comes into play.
You can imagine my delight when she called me Sunday not only to invite me over for dinner, but to tell me we'd be making Viceroy Burgers. Then I found out Sundays are for cheaters. Perfect!
viceroy burgers
makes 4
1 1/2 pounds lean ground beef
3 - 4 tablespoons Montreal Steak Seasoning
1 small sweet onion, sliced
1 tablespoon butter
2 tablespoons balsamic vinegar
4 tablespoons mayonnaise
1-2 teaspoons horseradish
6 strips thickly sliced bacon, cooked
gruyere cheese, sliced
blue cheese, crumbled
1 1/2 cups arugula
4 whole grain rolls or buns
Season ground beef with Montreal Steak Seasoning and form into 4 patties.
Melt butter over low heat in a small skillet. Add sliced onions and cook slowly until they begin to caramelize, about 15 - 20 minutes. Meanwhile combine horseradish and mayonnaise. Set aside. Add balsamic to skillet and allow onions to cook for another 2-3 minutes. Remove from skillet and set aside.
Place burgers on hot grill and allow to cook for 4 minutes on each side. Top with blue cheese and gruyere and allow cheese to melt. Remove from grill. Dress burgers with mayonnaise, bacon, caramelized onions and arugula. Serve hot.
This past Sunday, I buckled under the pressure. I cheated.
For those of you who are pure at heart (or maybe for those of you who aren't so pure at heart), don't get too excited. I wasn't part of a steamy sordid affair with a somehow inappropriate but incredibly good looking man. I'm in the middle of a two week cleanse and Sunday I gave in to a deliciously sinful burger. A burger that was worth every moment. Let me explain.
The inspiration for these burgers came long before my cleanse started and consequently a long way from home. I spent a week in Palm Springs this past February in the fabulous Viceroy Hotel which is home to a little restaurant called Citron. The restaurant was of course overpriced as most hotel restaurants are. So instead of ordering a $20 cheeseburger while lounging by the pool, my friend Jill jotted down all the ingredients to the Viceroy Burger. Horseradish aoli, balsamic onions, gruyere, bacon, blue cheese and arugula. Not one type of cheese, but two. And bacon. Now you see where the word sinful comes into play.
You can imagine my delight when she called me Sunday not only to invite me over for dinner, but to tell me we'd be making Viceroy Burgers. Then I found out Sundays are for cheaters. Perfect!
viceroy burgers
makes 4
1 1/2 pounds lean ground beef
3 - 4 tablespoons Montreal Steak Seasoning
1 small sweet onion, sliced
1 tablespoon butter
2 tablespoons balsamic vinegar
4 tablespoons mayonnaise
1-2 teaspoons horseradish
6 strips thickly sliced bacon, cooked
gruyere cheese, sliced
blue cheese, crumbled
1 1/2 cups arugula
4 whole grain rolls or buns
Season ground beef with Montreal Steak Seasoning and form into 4 patties.
Melt butter over low heat in a small skillet. Add sliced onions and cook slowly until they begin to caramelize, about 15 - 20 minutes. Meanwhile combine horseradish and mayonnaise. Set aside. Add balsamic to skillet and allow onions to cook for another 2-3 minutes. Remove from skillet and set aside.
Place burgers on hot grill and allow to cook for 4 minutes on each side. Top with blue cheese and gruyere and allow cheese to melt. Remove from grill. Dress burgers with mayonnaise, bacon, caramelized onions and arugula. Serve hot.
Saturday, April 10, 2010
sweet potato fries with truffle salt & garlic mayonnaise
There are a few times a year when I miss Pittsburgh weather. Right now is one of them. Temperatures in the Steel City have been topping out around 80 while here in Seattle it's seems as though Mother Nature has forgotten to take her meds. It actually snowed this week. Snowed. In the middle of April. In Seattle, where, mind you, it doesn't even snow in January. The random snow has been interspersed with days of hail, wind, rain and of course just enough sunshine to remind us all of what we're missing. Thank you Mother Nature. Please re-fill your prescriptions and start thinking happy (sunny) thoughts.
The few days of sunshine have left me aching to get my grill out. (I'm sorry to report that it is sitting idly in my garage. I'm afraid the thing might blow away in a freak windstorm!) Even though grill season hasn't exactly started, I've already been brainstorming about what wonderful things I can grill up once it's time. These sweet potato fries are a result of the thought process. While they don't require a grill, they will pair wonderfully with many outdoor inspired meals. Plus, this gave me a chance to try out my new mandolin slicer. If you've never had a sweet potato fry, it's time to broaden your fry horizon. They're amazing... of course, most things dipped in mayonnaise are. Enjoy!
sweet potato fries with truffle salt & garlic mayonnaise
makes 4 to 6 servings
5 sweet potatoes, cut into about 1 by 5 inch "fries"
3 tablespoons olive oil
1-2 teaspoons truffle salt
1/2 teaspoon freshly ground pepper
3/4 cup mayonnaise
1 clove of garlic, minced then crushed
1 tablespoon lemon juice
Preheat oven to 400 degrees. Place the sweet potato "fries" on a foil lined baking sheet and toss with the olive oil. Bake until golden, about 45 minutes. Meanwhile, combine the mayonnaise, garlic and lemon juice in a small bowl. Stir to combine. When the sweet potato fries come out of the oven, sprinkle with truffle salt and pepper. Serve with the garlic mayonnaise along side for dipping.
The few days of sunshine have left me aching to get my grill out. (I'm sorry to report that it is sitting idly in my garage. I'm afraid the thing might blow away in a freak windstorm!) Even though grill season hasn't exactly started, I've already been brainstorming about what wonderful things I can grill up once it's time. These sweet potato fries are a result of the thought process. While they don't require a grill, they will pair wonderfully with many outdoor inspired meals. Plus, this gave me a chance to try out my new mandolin slicer. If you've never had a sweet potato fry, it's time to broaden your fry horizon. They're amazing... of course, most things dipped in mayonnaise are. Enjoy!
sweet potato fries with truffle salt & garlic mayonnaise
makes 4 to 6 servings
5 sweet potatoes, cut into about 1 by 5 inch "fries"
3 tablespoons olive oil
1-2 teaspoons truffle salt
1/2 teaspoon freshly ground pepper
3/4 cup mayonnaise
1 clove of garlic, minced then crushed
1 tablespoon lemon juice
Preheat oven to 400 degrees. Place the sweet potato "fries" on a foil lined baking sheet and toss with the olive oil. Bake until golden, about 45 minutes. Meanwhile, combine the mayonnaise, garlic and lemon juice in a small bowl. Stir to combine. When the sweet potato fries come out of the oven, sprinkle with truffle salt and pepper. Serve with the garlic mayonnaise along side for dipping.
Labels:
sweet potatoes
Saturday, April 3, 2010
Pick of the Month: Waffle Iron
I must apologize. I was incredibly absent during the month of March. It came in like a lion...and I have yet to experience the "lamb" like end.Since March has been so crazy and I'm posting it's Pick of the Month in April, I've decided that the item is going to be something that is merely on my wish list - a waffle iron! The reason I want a waffle iron is really quite simple. I love waffles. I love everything about them. Sorry pancakes. You may be my breakfast mistress but when it comes to true love, it's all about waffles. Slathered in peanut butter, swimming in syrup...maybe topped with fried chicken and gravy? Oh yes. For those of you who think chicken and waffles sounds like a bad idea, please see the photo to your right. I dare you to try it and still have the same opinion. This picture was taken in Brooklyn and I still practically drool every time I see it.
Maybe April will finally be the month I take a waffle iron off my wish list and put it in my kitchen. Now I just need to work on a good chicken recipe....
Labels:
pick of the month
Monday, March 22, 2010
sunny day couscous salad
We've finally turned the clocks ahead which means summer is on the bend....finally! I, like many others, have been impatiently waiting for warmer weather. While balmy days aren't here just yet, the sun has been making an appearance in Seattle. Anyone who lives here knows that even a glimmer of sunshine gets everyone out of hibernation and onto the trails; which is exactly where I ended up the weekend before last.
Since going for a hike was a last minute idea and stock from our last CSA box was running low, snacks for the trail were in short supply. After scrounging through the pantry and the fridge, I threw together the following salad. Couscous can be eaten cold making it perfect for picnics or hiking. I added zucchini, mushrooms and green onions to this version but honestly, pretty much anything could work! The cashews added a nice crunch and some protein too. Enjoy!
sunny day couscous salad
makes 2 - 3 large servings
1 cup couscous
1 tablespoon butter
1 small zucchini, sliced
4-5 cremini mushrooms, sliced
1-2 green onions, chopped
1/4 cup golden raisins
1/4 cup chopped cashews
salt
Prepare couscous according to package directions. Melt butter in a medium skillet over medium high heat. Add zucchini, mushrooms and green onions. Saute until tender, about 5 minutes. Add vegetables, raisins and chopped cashews to fluffed couscous. Mix to combine. Salt to taste. Allow to cool before serving.
Since going for a hike was a last minute idea and stock from our last CSA box was running low, snacks for the trail were in short supply. After scrounging through the pantry and the fridge, I threw together the following salad. Couscous can be eaten cold making it perfect for picnics or hiking. I added zucchini, mushrooms and green onions to this version but honestly, pretty much anything could work! The cashews added a nice crunch and some protein too. Enjoy!
sunny day couscous salad
makes 2 - 3 large servings
1 cup couscous
1 tablespoon butter
1 small zucchini, sliced
4-5 cremini mushrooms, sliced
1-2 green onions, chopped
1/4 cup golden raisins
1/4 cup chopped cashews
salt
Prepare couscous according to package directions. Melt butter in a medium skillet over medium high heat. Add zucchini, mushrooms and green onions. Saute until tender, about 5 minutes. Add vegetables, raisins and chopped cashews to fluffed couscous. Mix to combine. Salt to taste. Allow to cool before serving.
Sunday, February 28, 2010
Pick of the Month: Cutting Boards
I know. Cutting boards are nothing new. Nor are they some sort of wish list item that I have been pining for in my kitchen. They do deserve some discussion though since they are a mainstay in any kitchen and consequently take a lot of abuse. It’s hard to have a conversation about cutting boards without talking about knives at the same time. In fact, a knife skills class is precisely what enlightened me on this topic.
First let’s talk about the importance of owning proper cutting boards. Mainly they protect your countertops but they also protect your precious knives. The wrong cutting board will unnecessarily dull any knife regardless of price or quality. Unfortunately dull knives are not only a waste of time, they also lead to accidents. You would think the opposite to be true, but dull knives slip or require unnecessary pressure to cut – perfect components for a nasty accident.
Cutting boards can also be dangerous from a cleanliness viewpoint. If you own plastic cutting boards, please retrieve them from your kitchen after you read this. Run your hand across the surface. Feel fuzzy? If it does, it’s time for a new board. All that texture resulting from hours of use and love is a breeding ground for bacteria. Hey, it’s an excuse to go shopping anyway.
Before we talk about type – wood vs plastic vs bamboo – let’s talk about a few other components. Best practice is to have three – one small, one medium and one large to fit any job. They should be soft enough so as to not dull your knife, double sided and anti-slip. Double-sided boards give you double the cutting surface by simply flipping them over. A simple for trick for making any cutting board no slip: shelf liner. Not flowery contact paper, but the rubbery no-slip lattice woven stuff. Cut it into squares that can be placed between your countertop and board et voila! No more chasing the board all over the counter as you chop. This simple trick is a serious time and sanity saver. Promise! Plus, the squares can be thrown in the dishwasher. Easy!
So now the obvious question. What type of cutting board is best?
Wood: Chefs everywhere will contest that wood is the best surface for chopping. I personally have a large wood cutting board in my kitchen and absolutely love it. Aesthetically they’re beautiful. They’re great for your knives since the surface is soft enough not to dull them. However they do have some downsides. They can be expensive depending on the size. They require hand washing – no dishwashers – and you can’t prep everything on them. Meat and fish are no no’s because the wood will soak up bacteria. Also, anything with a strong odor – think garlic and onions – will “season” your board.
Bamboo: While bamboo boards are beautiful, they’re not recommended. Mainly, the surface is too hard and will dull your knives more quickly. While we all know that often-used knives need to be sharpened weekly, who wants to expedite the process
Stone: Again, the surface is not recommended due to its density. It should be noted here as well that the incredibly thin flexible plastic cutting boards are not recommended either. I mention it here because laying one on a hard countertop – such as granite or marble – provides no protection for your knife. Plus keeping one of those in place is nearly impossible. I realize I keep circling back to the same point but where would you be in your kitchen with out your knife? Lost I imagine! The more money you spend on a quality knife, an entirely separate discussion, the more you should want to protect your investment.
Plastic: When it comes to ease and versatility, plastic boards have it covered. They’re dishwasher safe, don’t readily absorb strong smells or bacteria and come in a variety of fun colors. When picking out a plastic cutting board, it should be completely smooth, no visible texture, as the texture will only dull your knife. Also, just like with bamboo or stone, you don’t want the board to be too hard. Pick one that seems easily scratched with your fingernail, meaning it’s not too hard for your knife. It should be double sided – twice the surface area! The one I have featured in the photo here is actually a great no slip board. Manufactured by Oneida and available at Bed, Bath and Beyond, the rubbery grey handles successfully kept the board from sliding across a wet granite countertop as I was using it this weekend. I just bought this one for my parents for Christmas. I can attest that it fits the criteria.
So there you have it! Longwinded, but now you have an arsenal of information for your next trip to the kitchen store. You did just throw out your old fuzzy boards, right?
First let’s talk about the importance of owning proper cutting boards. Mainly they protect your countertops but they also protect your precious knives. The wrong cutting board will unnecessarily dull any knife regardless of price or quality. Unfortunately dull knives are not only a waste of time, they also lead to accidents. You would think the opposite to be true, but dull knives slip or require unnecessary pressure to cut – perfect components for a nasty accident.
Cutting boards can also be dangerous from a cleanliness viewpoint. If you own plastic cutting boards, please retrieve them from your kitchen after you read this. Run your hand across the surface. Feel fuzzy? If it does, it’s time for a new board. All that texture resulting from hours of use and love is a breeding ground for bacteria. Hey, it’s an excuse to go shopping anyway.
Before we talk about type – wood vs plastic vs bamboo – let’s talk about a few other components. Best practice is to have three – one small, one medium and one large to fit any job. They should be soft enough so as to not dull your knife, double sided and anti-slip. Double-sided boards give you double the cutting surface by simply flipping them over. A simple for trick for making any cutting board no slip: shelf liner. Not flowery contact paper, but the rubbery no-slip lattice woven stuff. Cut it into squares that can be placed between your countertop and board et voila! No more chasing the board all over the counter as you chop. This simple trick is a serious time and sanity saver. Promise! Plus, the squares can be thrown in the dishwasher. Easy!
So now the obvious question. What type of cutting board is best?
Wood: Chefs everywhere will contest that wood is the best surface for chopping. I personally have a large wood cutting board in my kitchen and absolutely love it. Aesthetically they’re beautiful. They’re great for your knives since the surface is soft enough not to dull them. However they do have some downsides. They can be expensive depending on the size. They require hand washing – no dishwashers – and you can’t prep everything on them. Meat and fish are no no’s because the wood will soak up bacteria. Also, anything with a strong odor – think garlic and onions – will “season” your board.
Bamboo: While bamboo boards are beautiful, they’re not recommended. Mainly, the surface is too hard and will dull your knives more quickly. While we all know that often-used knives need to be sharpened weekly, who wants to expedite the process
Stone: Again, the surface is not recommended due to its density. It should be noted here as well that the incredibly thin flexible plastic cutting boards are not recommended either. I mention it here because laying one on a hard countertop – such as granite or marble – provides no protection for your knife. Plus keeping one of those in place is nearly impossible. I realize I keep circling back to the same point but where would you be in your kitchen with out your knife? Lost I imagine! The more money you spend on a quality knife, an entirely separate discussion, the more you should want to protect your investment.
Plastic: When it comes to ease and versatility, plastic boards have it covered. They’re dishwasher safe, don’t readily absorb strong smells or bacteria and come in a variety of fun colors. When picking out a plastic cutting board, it should be completely smooth, no visible texture, as the texture will only dull your knife. Also, just like with bamboo or stone, you don’t want the board to be too hard. Pick one that seems easily scratched with your fingernail, meaning it’s not too hard for your knife. It should be double sided – twice the surface area! The one I have featured in the photo here is actually a great no slip board. Manufactured by Oneida and available at Bed, Bath and Beyond, the rubbery grey handles successfully kept the board from sliding across a wet granite countertop as I was using it this weekend. I just bought this one for my parents for Christmas. I can attest that it fits the criteria.
So there you have it! Longwinded, but now you have an arsenal of information for your next trip to the kitchen store. You did just throw out your old fuzzy boards, right?
Labels:
pick of the month
Subscribe to:
Posts (Atom)